


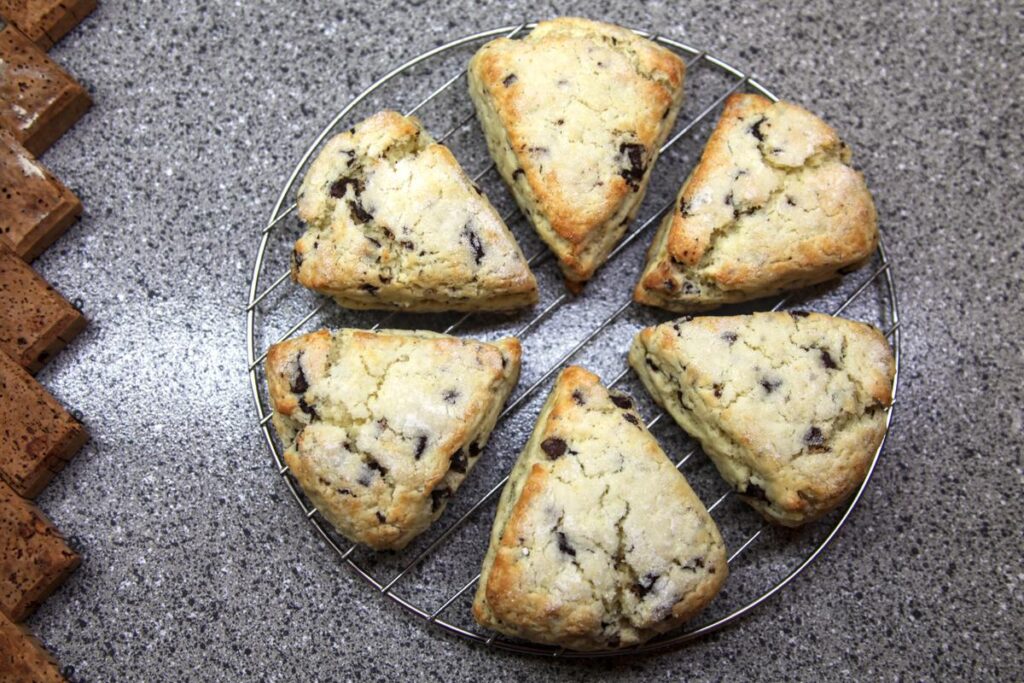
These scones are my absolute favorite; tender, flaky, and imperceptibly gluten free! Adding bittersweet chocolate chunks adds a pleasant bitterness to complement the sweetness of the scone.
I’ve always been a little confused about scones vs biscuits. As far as I can tell, they should both be light and flaky with crisp edges but a tender center (just like these scones!). At this point, I’m about 50% convinced that it’s actually about shape; it’s a biscuit if it’s round or square and a scone if it’s triangular. Or maybe scones are for breakfast and biscuits are for dinner? But then there are savory scones and sweet biscuits. These scones are sweet (not savory) and triangular, so they’re definitely scones. Unless you make them square and eat them with dinner, in which case I suppose it’s anyone’s guess.
Special Equipment
A bench scraper with measurements on it is useful, but not necessary. I prefer this one.
Sourcing Gluten Free Flours
The quality of gluten free flours is very important for the final product. The more finely ground the flour, the more successful your baked goods will be. If your baked goods aren’t turning out quite how you’d like them to, your flour might be the culprit.
For information on where I source my gluten free flours, check out my post on sourcing gluten free flours.
Detailed Instructions
Scones are a type of pastry, which means that it’s very important for the butter and other wet ingredients to remain very cold. This helps to create the flaky texture that they are known for by preventing the butter from completely integrating into the flour. To this end, keep your butter in the freezer until right before you use it.
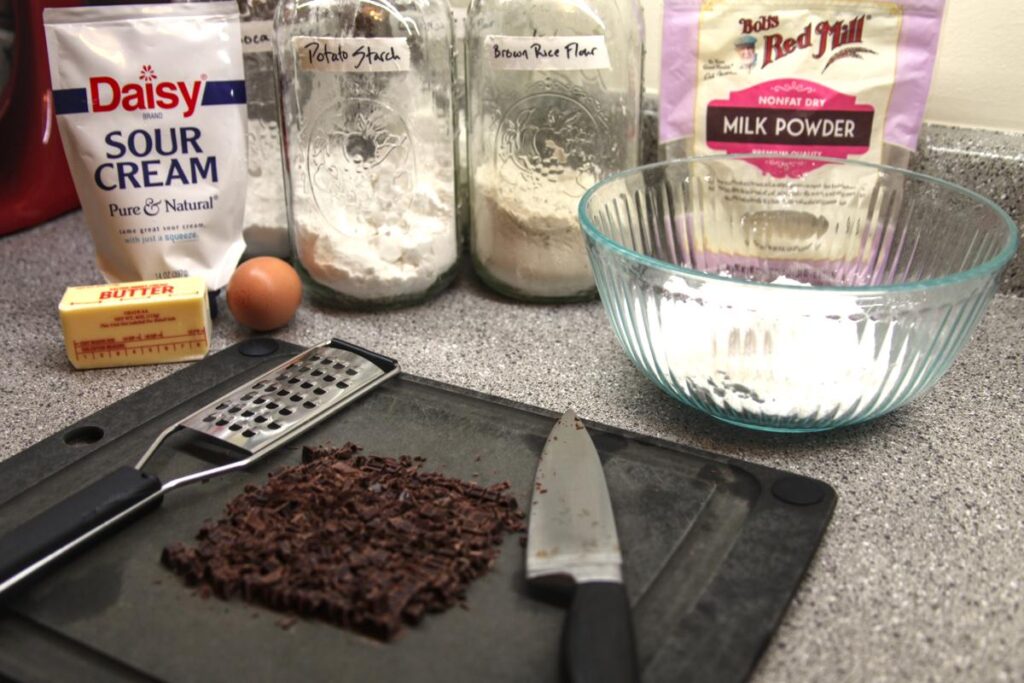
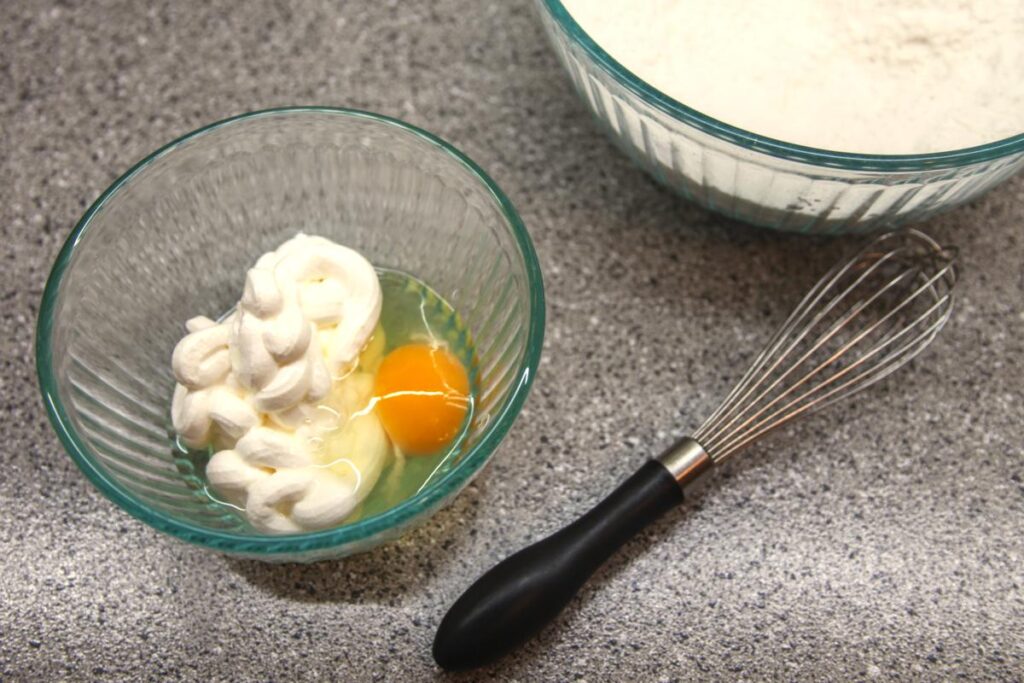
Prepare your ingredients. Start by whisking the sour cream and eggs together and then placing them in the refrigerator until you need them later in the recipe. Chop your chocolate. Measure out your dry ingredients and whisk them together thoroughly.
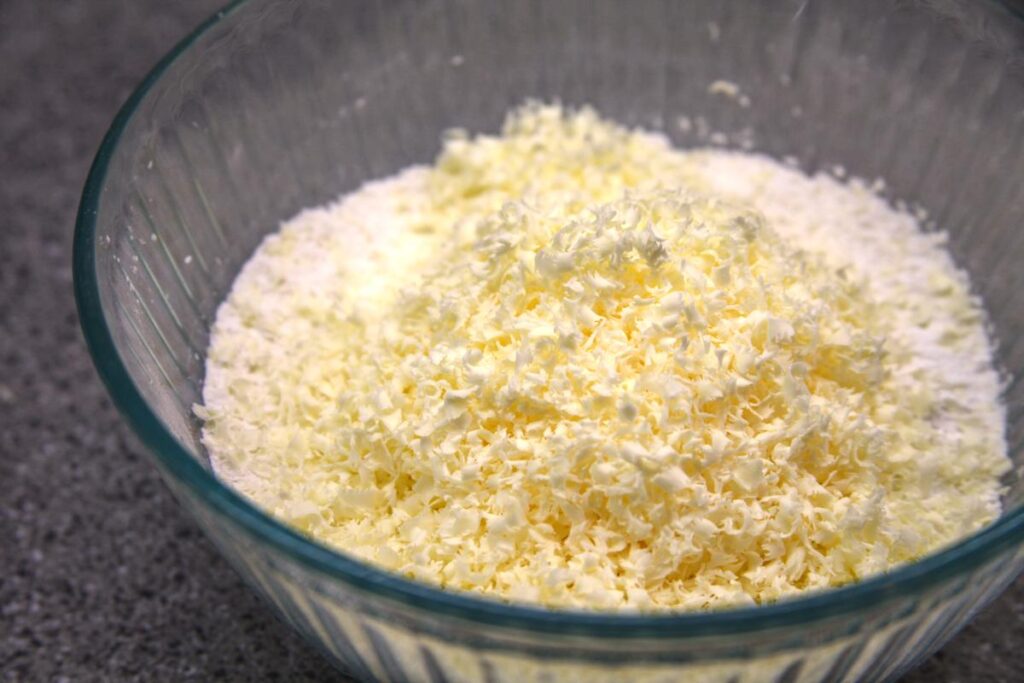
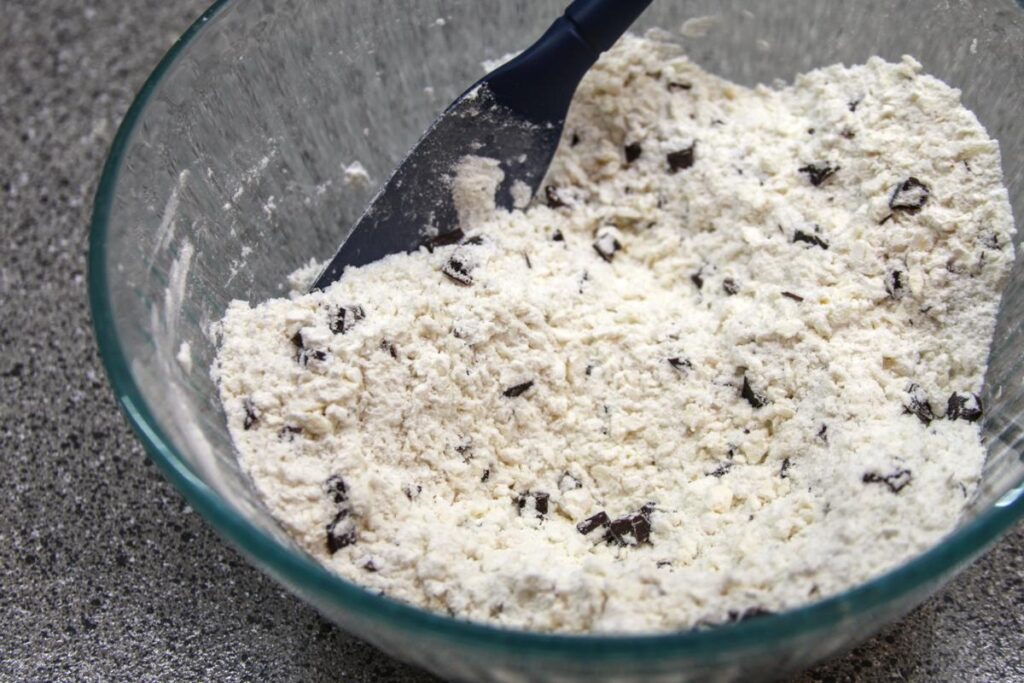
Using the large side of the grater, grate the frozen butter into the dry ingredients.
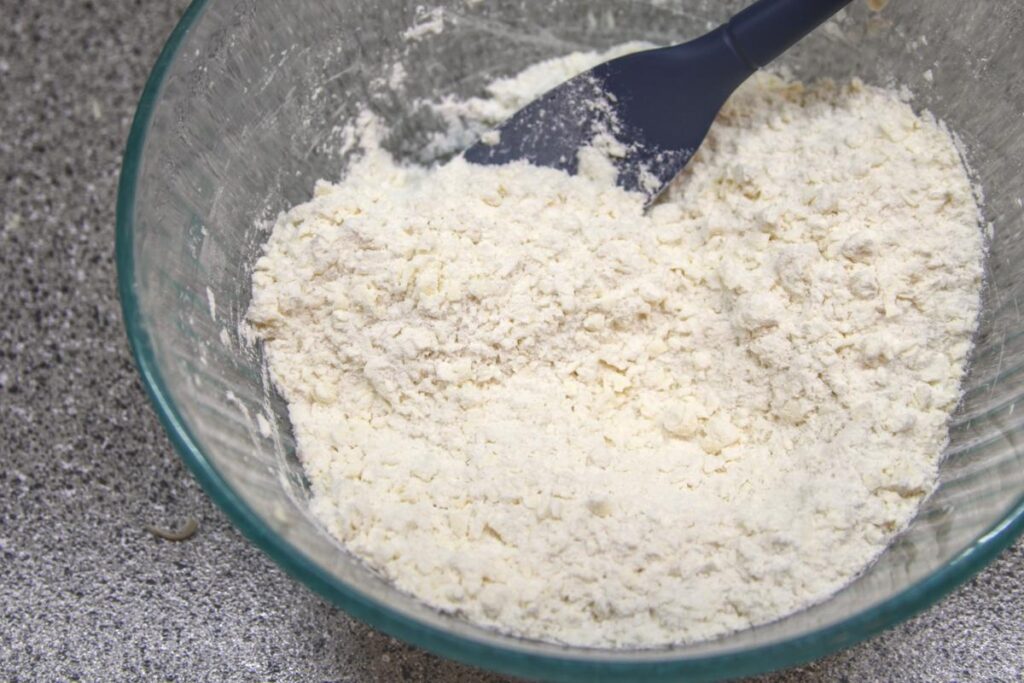
Gently stir the grated butter into the dry ingredients using a spatula. Add the chocolate and stir until combined.
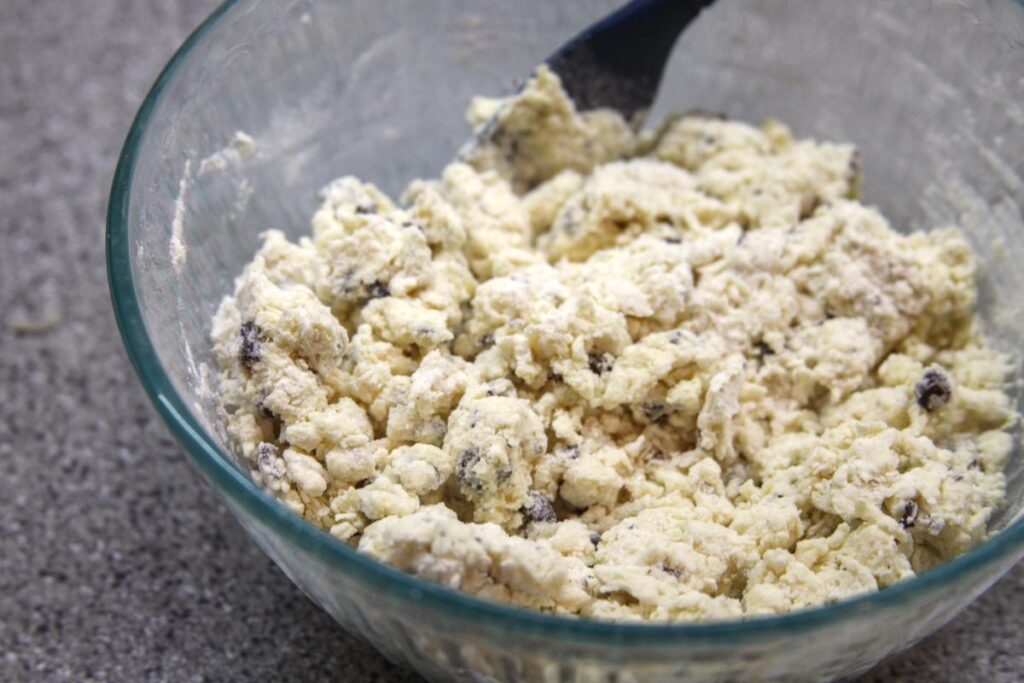
Remove the sour cream mixture from the fridge and add to the dry ingredients. Mix, using the spatula, until the dough is course and shaggy and you can’t incorporate any more of the flour.
Begin kneading the dough, either on a countertop lightly dusted with rice flour or directly in the bowl. Continue kneading until the dough has just come together. Avoid continuing to work the dough — heat from your hands will warm the butter and reduce the flakiness of the baked scones.
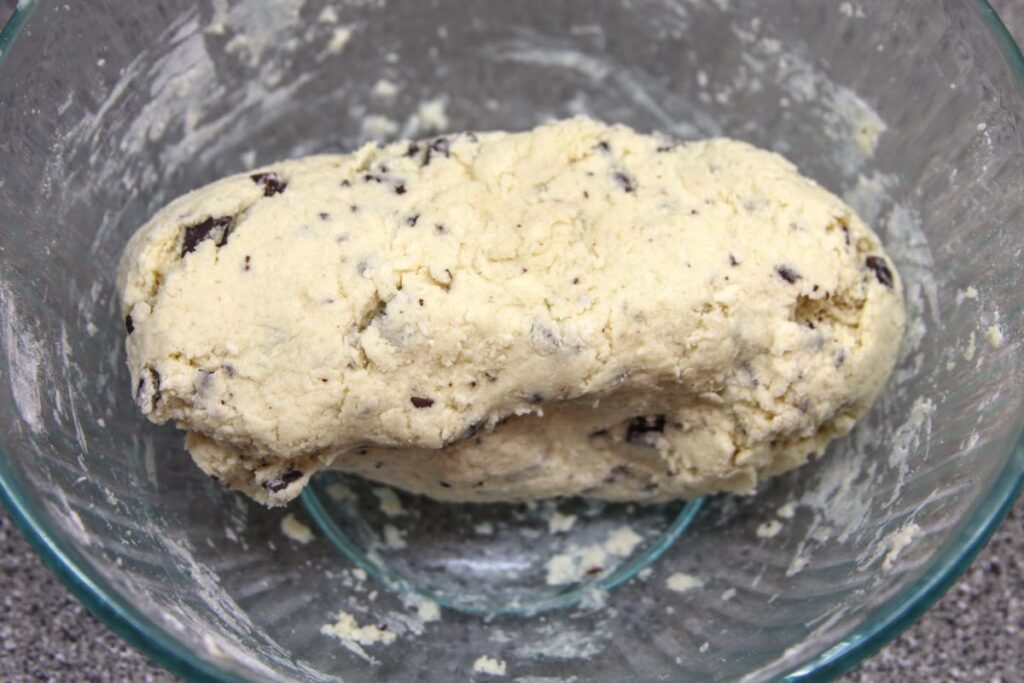
Press the dough out into a round and wrap in plastic wrap. Place in the refrigerator for 30 minutes to allow the flours to hydrate. The refrigeration keeps the butter cool to prevent full integration into the dough.
While the dough is resting, preheat the oven to 500oF. We won’t bake the scones at this temperature, but the extra heat at the beginning of baking will increase rise and help the tops to brown without burning the bottoms. Prepare a baking sheet by lining it with parchment paper or a silicone liner.
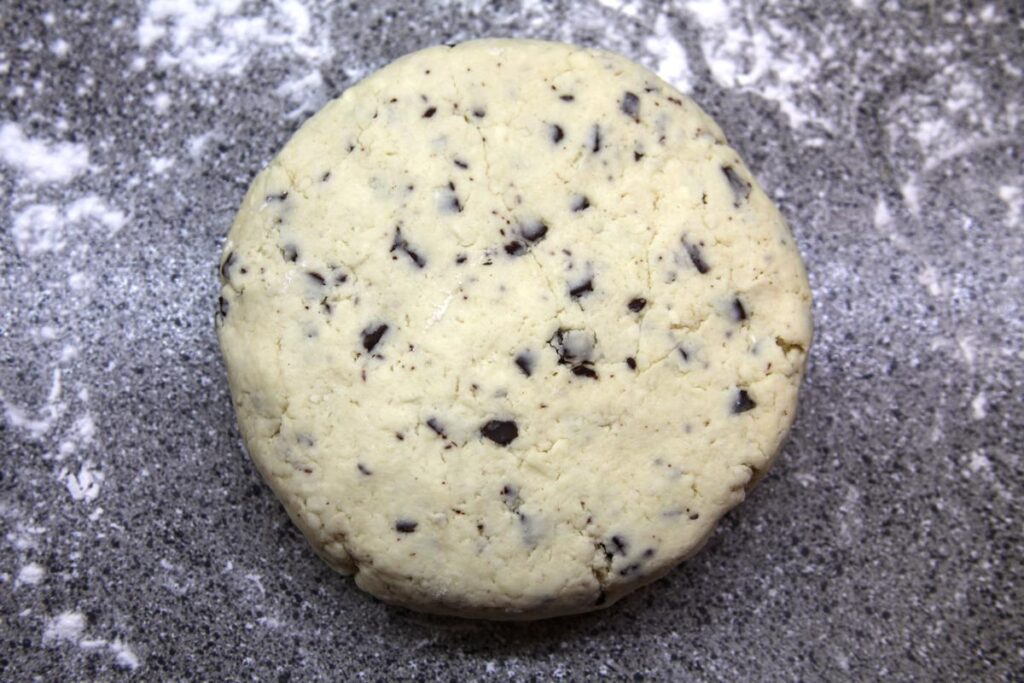
After the 30 minutes is over, remove the dough from the fridge and place it on a countertop lightly floured with rice flour. Pat into a round roughly 6 inches in diameter. This is where the bench scraper with marked measurements comes in very handy.
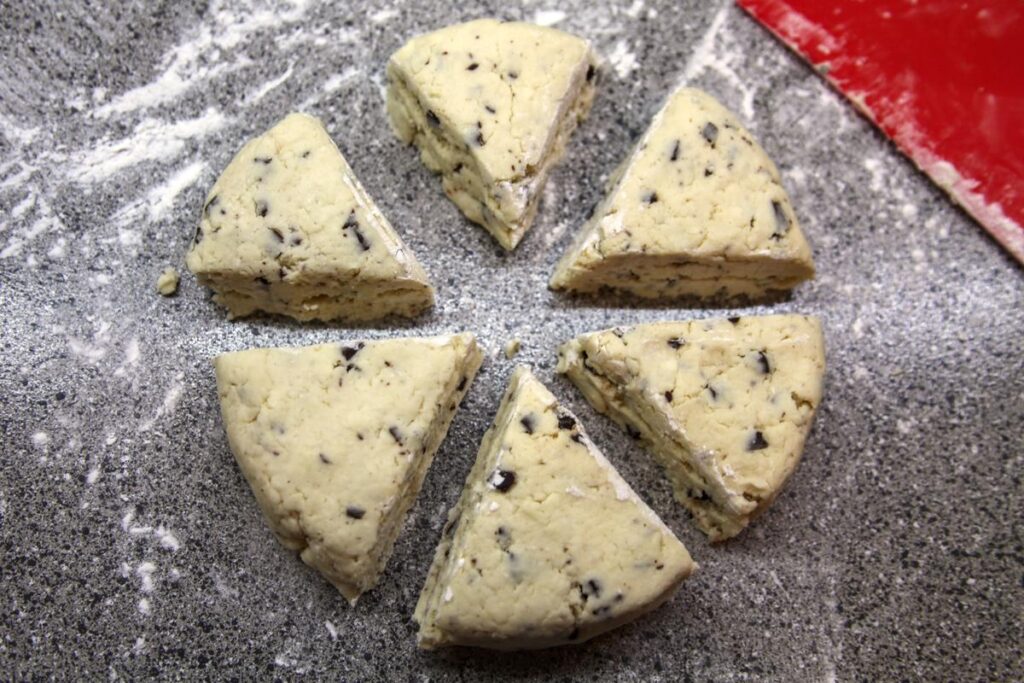
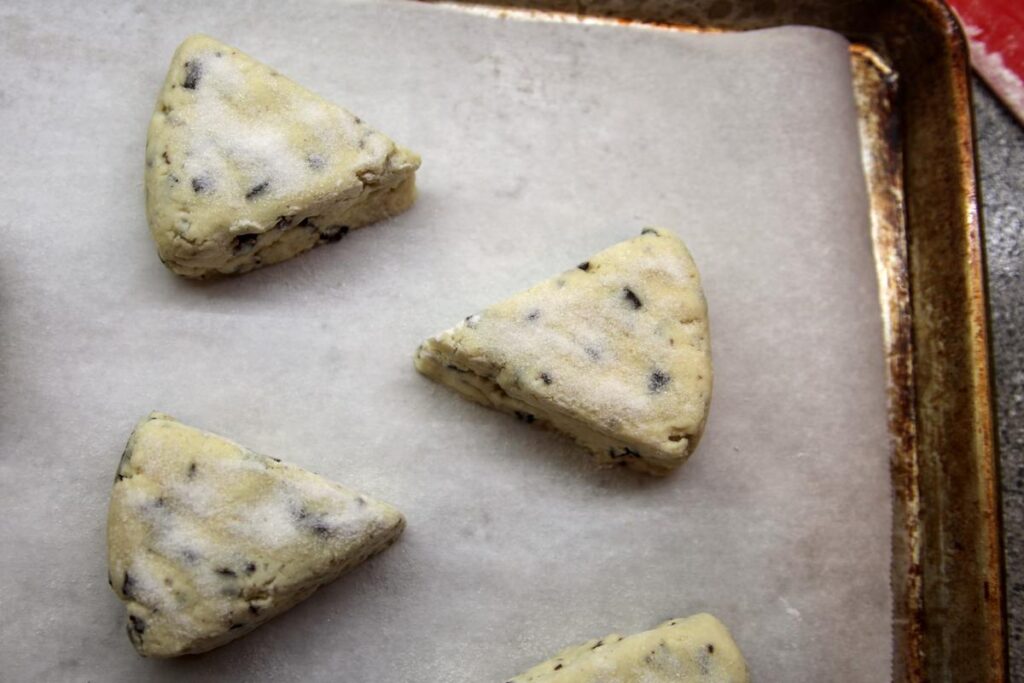
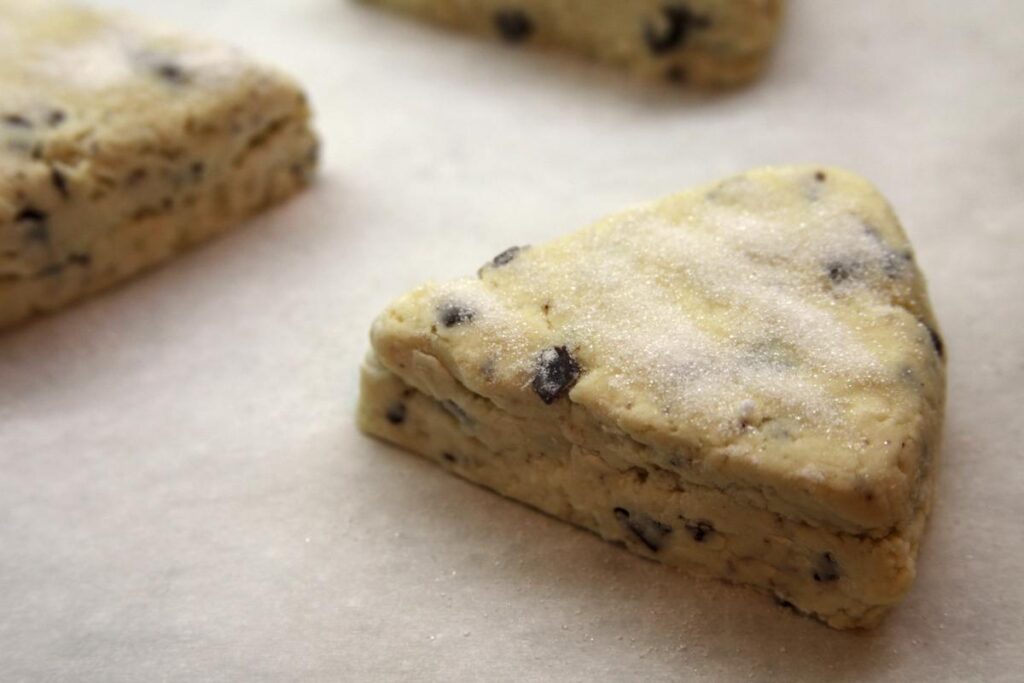
Cut the dough into six equally sized wedges. I’ve found that flouring the blade (especially after the first cut) can make cutting the wedges easier. Arrange the wedges on the prepared baking sheet and sprinkle the top of each with granulated sugar. I use about a teaspoon TOTAL across all six scones.
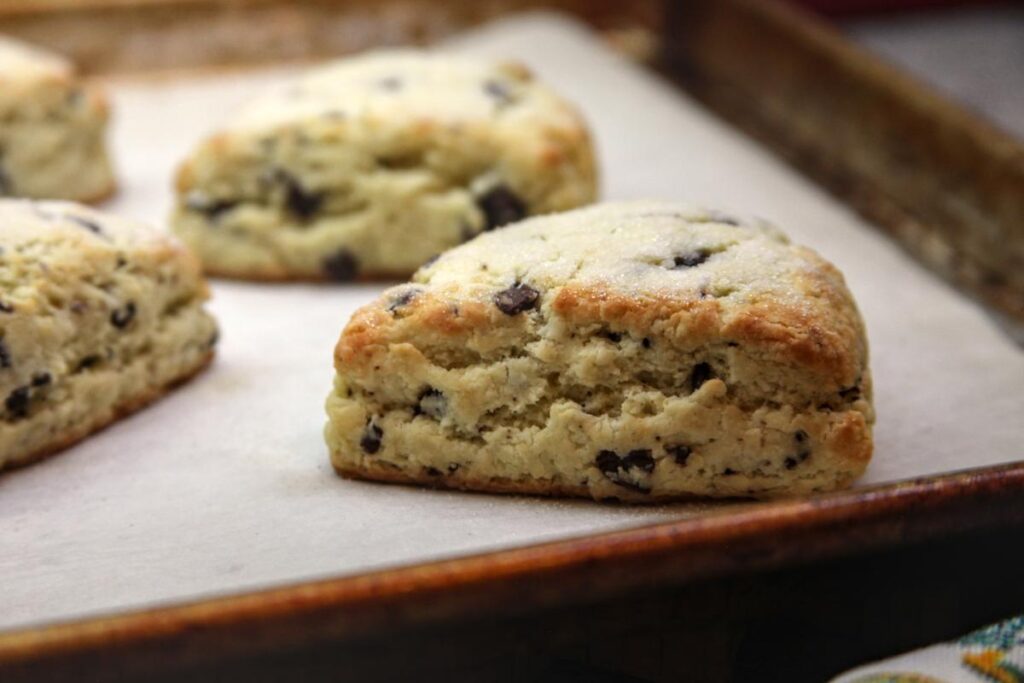
Place the baking sheet in the oven and immediately turn the temperature down to 425oF. Bake for 12 – 14 minutes until the tops are lightly browned.
Substitutions
The nonfat dry milk powder in this recipe contributes to texture and structure during baking, but isn’t necessary to yield a delicious scone. It can be omitted if you don’t have any or don’t want to add additional dairy to the recipe.
I’ve successfully substituted some heavy cream for part of the sour cream when I ran out of sour cream unexpectedly.
Flour substitutions are definitely possible, but I haven’t experimented with this recipe. If you try some different flours, let me know how it goes in the comments!
Storage
After scones have cooled completely, store in a plastic bag or tupperware for up to four days.
Gluten free baked goods can sometimes have a tough, crumbly texture after a day or two. I’ve found that reheating restores them to their previous tender state. To reheat, microwave for 15-30 seconds.
Gluten Free Chocolate Chunk Scones
These scones are tender, flaky, and imperceptibly gluten free! The bittersweet chocolate chunks adds a pleasant bitterness to complement their sweetness.

Ingredients
Instructions
-
In a small bowl, whisk together the sour cream and egg. Place in fridge or set aside.
-
In a medium bowl, whisk together dry ingredients. Grate the frozen butter into the dry ingredients, then stir in until the butter is thoroughly distributed into the flour. Stir in the chocolate chunks.
-
Pour the sour cream mixture into the flour mixture and mix until the dough forms shaggy clumps. Turn out onto a lightly floured countertop and knead briefly until the dough has just come together. Pat into a round, roughly 6 inches in diameter, then wrap in plastic wrap and refrigerate for 1/2 hour.
-
While dough is resting, preheat the oven to 500oF. After 30 minutes, remove the dough from the fridge and slice into six equal sections. Arrange on a parchment lined baking sheet and dust the top of each scone with granulated sugar.
-
To bake, turn the oven down to 425oF right after putting the scones into the oven. Bake 12-14 minutes. Allow to cool for 10-15 minutes before eating.