


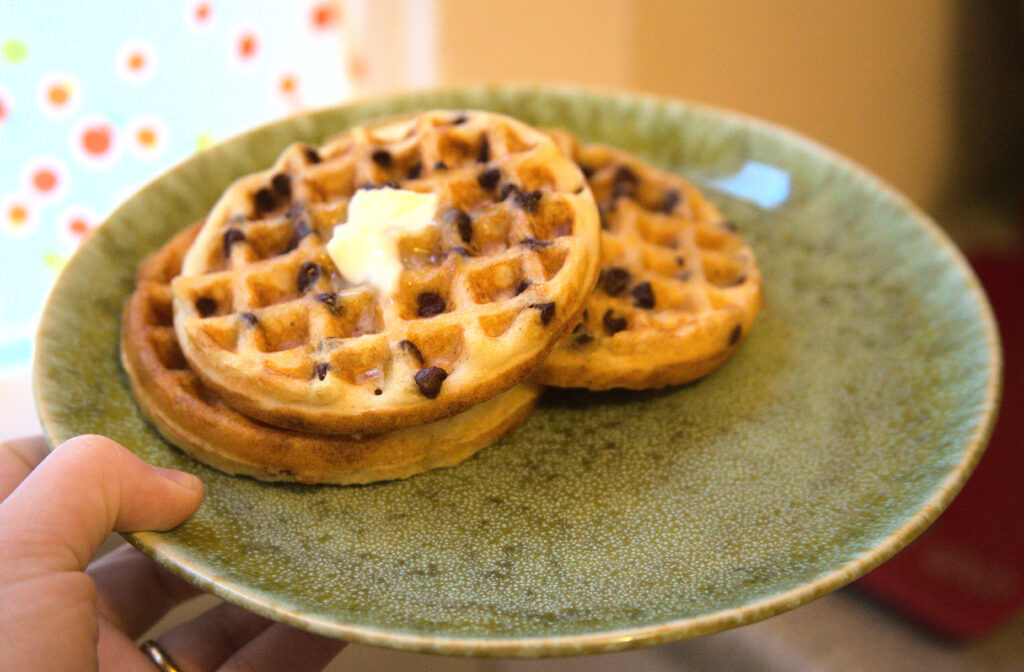
Back before my diagnosis, I liked a good old fashioned Eggo waffle. I especially enjoyed eating the chocolate chip ones while they were still frozen during summer; I just took them straight out of the freezer and ate them. Yes, I did this as an adult. For a while, we also had a fancy Belgian waffle iron that we had to give away when I was diagnosed. I liked to have them on Sunday mornings topped with whipped cream, lemon curd, and mint. All of which is to say, I like a good waffle.
I didn’t develop this recipe until a friend mentioned the little $10 waffle iron she used in college and it occurred to me that waffle irons are inexpensive these days. This recipe uses only two flours and the batter keeps well in the fridge for up to a week with the assistance of the sourdough culture. I’ve found that the flavor is best after it has been in the fridge a day or two. The sourdough starter can be replaced with equal amounts flour and water if you haven’t yet begun your sourdough journey.
Special Equipment
- Waffle iron (such as this mini one)
- Whisk
- Scale
I will be honest, this is a little bit of a pitch for a mini waffle iron. Yes, that’s an affiliate link, but I have had so many waffles because of this tiny thing. It’s cheap, it’s cute, and it makes a mean waffle. They’re perfectly Eggo waffle sized too! It’s quick, it’s simple. I honestly cannot recommend it enough. If you’re a fan of waffles and only get them at restaurants, go get yourself one of these $10 waffle irons, you won’t regret it.
Recipe Tips and Notes
This is a pretty simple recipe, just whisk the dry ingredients together, add the wet ingredients, and beat until smooth. There are a couple of areas where problems can arise, and they’re all related to judging the state of the batter.
A note: you don’t have to use sourdough starter! If you don’t have a gluten free starter, replace the 100g sourdough starter with 50g brown rice flour and 50g water.
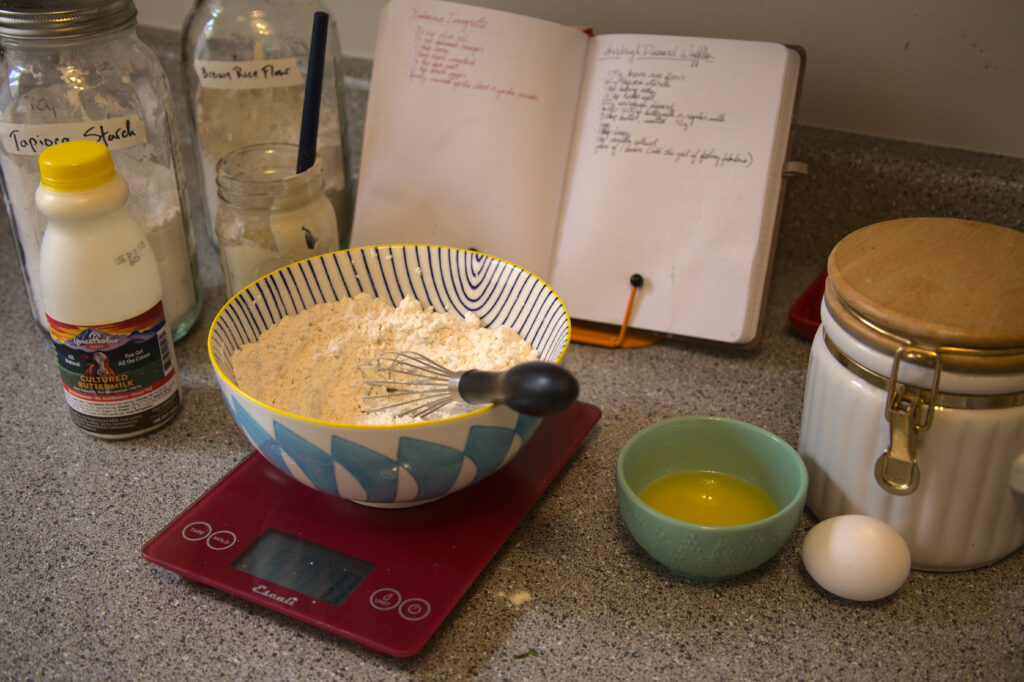
Weigh out all dry ingredients and whisk to combine, adding 50g brown rice flour if omitting the starter. Prep all of your wet ingredients, then add 180g buttermilk, egg, vanilla extract, lemon juice, and sourdough starter (or 50g water, if not including the starter). Whisk thoroughly to combine. DO NOT ADD THE BUTTER YET!
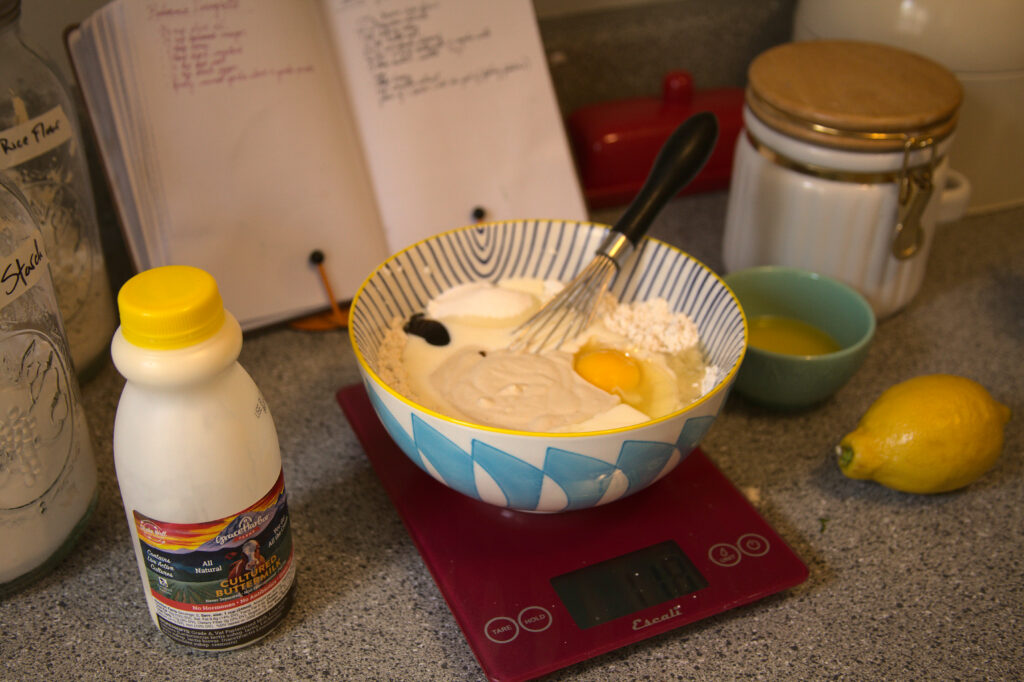
Once thoroughly mixed, assess the consistency. The picture below on the left needs more liquid. Start by adding 1-2 tbsp more buttermilk. The picture on the right shows the correct consistency.
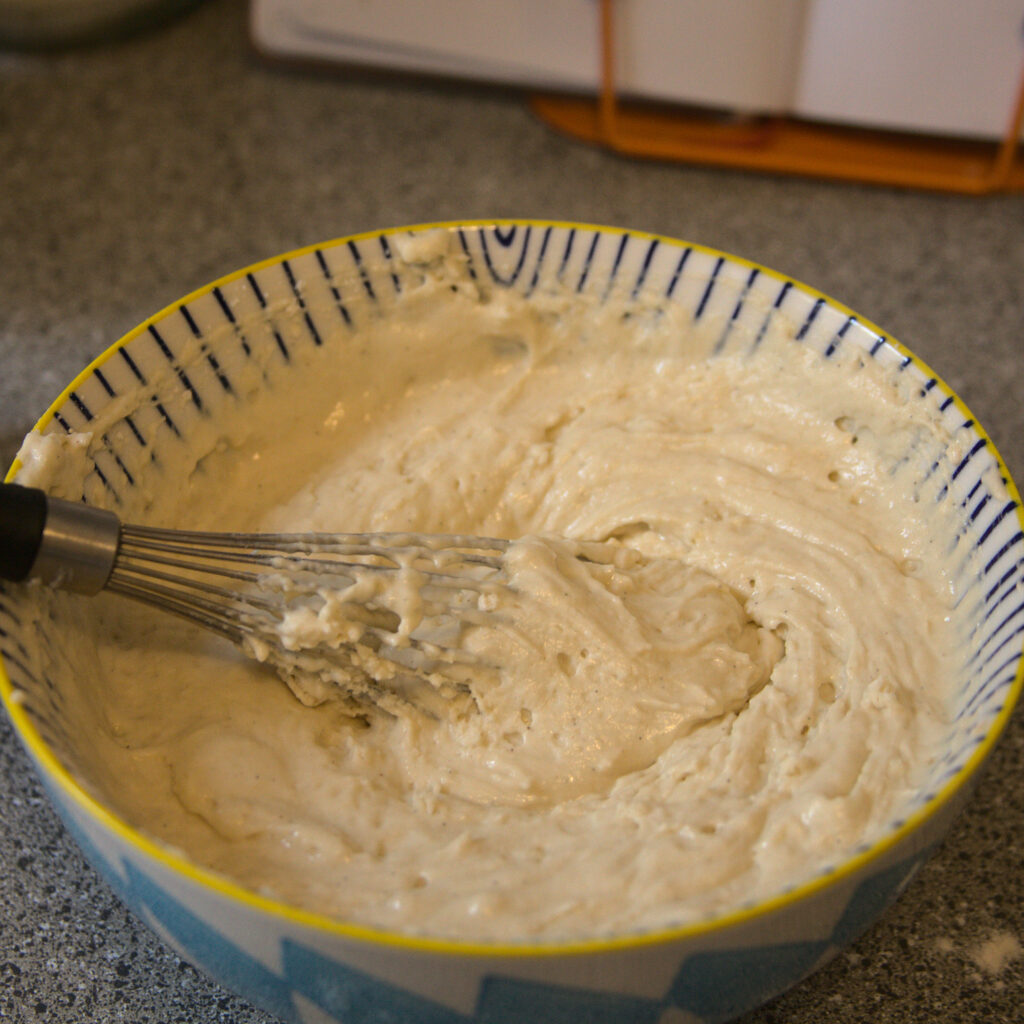
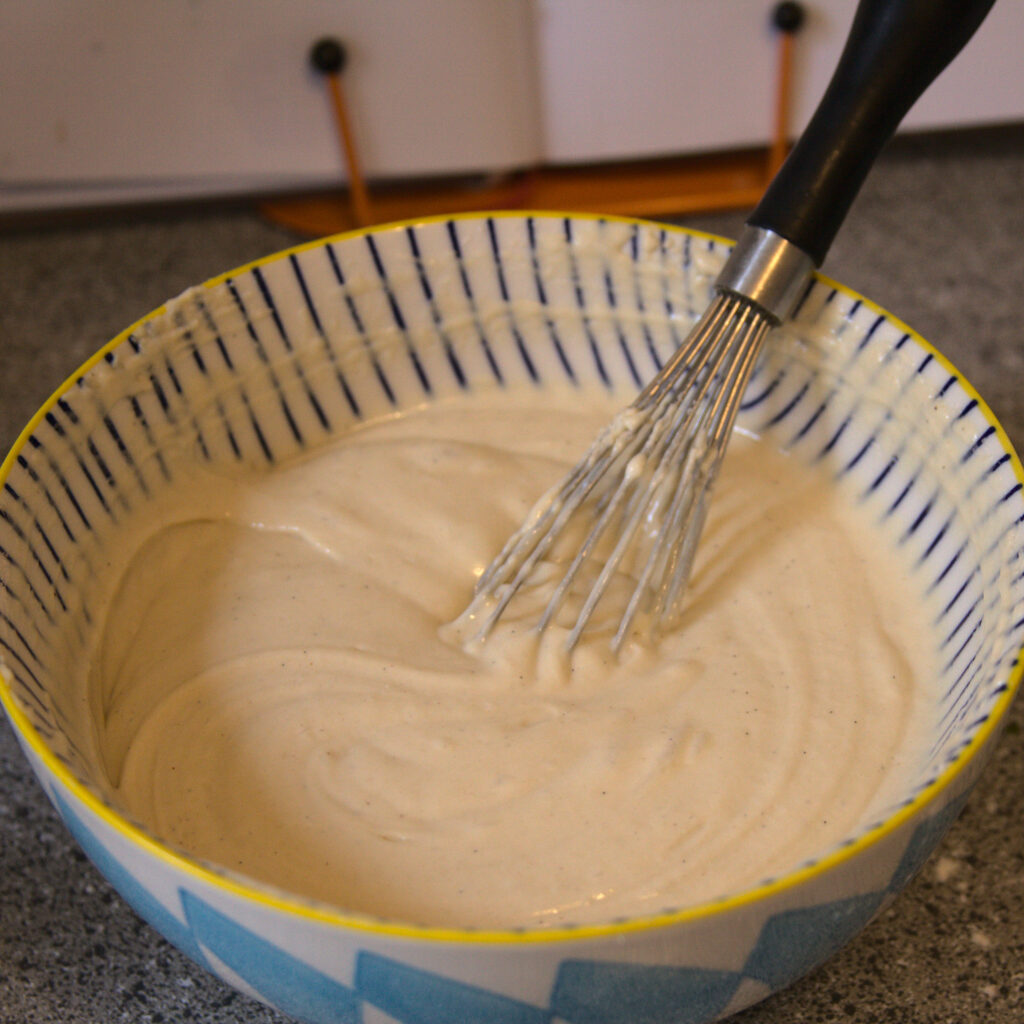
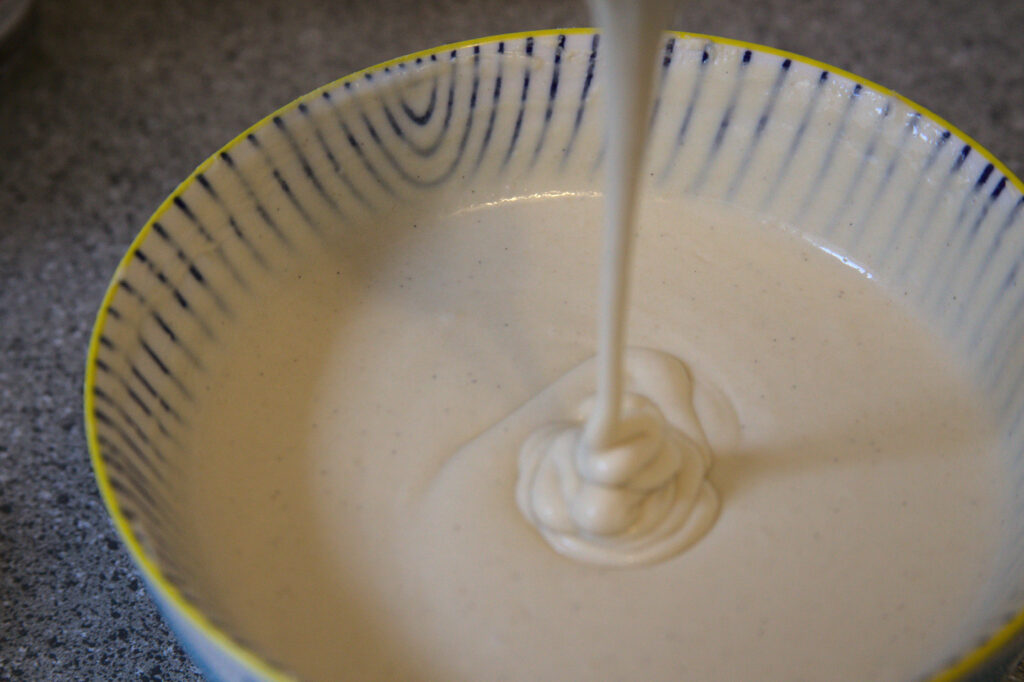
Once the amount of buttermilk has been adjusted, it’s time to add the butter. Drizzle in the butter while whisking constantly. This will help the butter incorporate without clumping from coming in contact with cold ingredients. When done correctly, this creates a glossy, smooth batter. When lifted, the batter should flow off the whisk in a smooth, thin ribbon, and pile on itself before merging with the rest of the batter (see below).
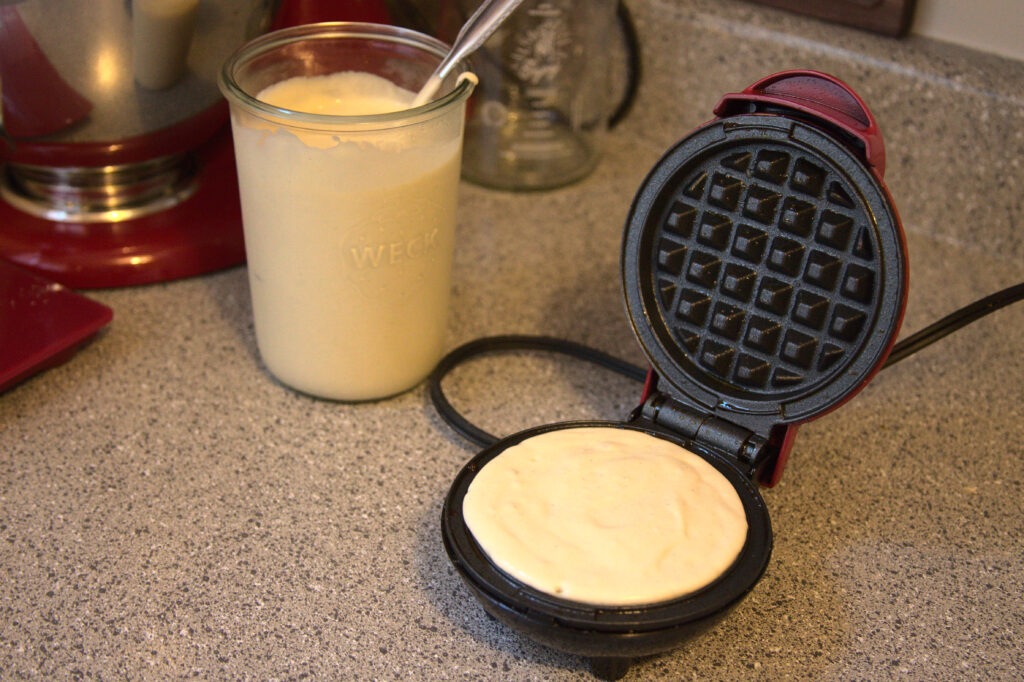
Congratulations! Now you’re ready to make waffles! I use two serving-sized spoonfuls of batter for the mini waffle maker.
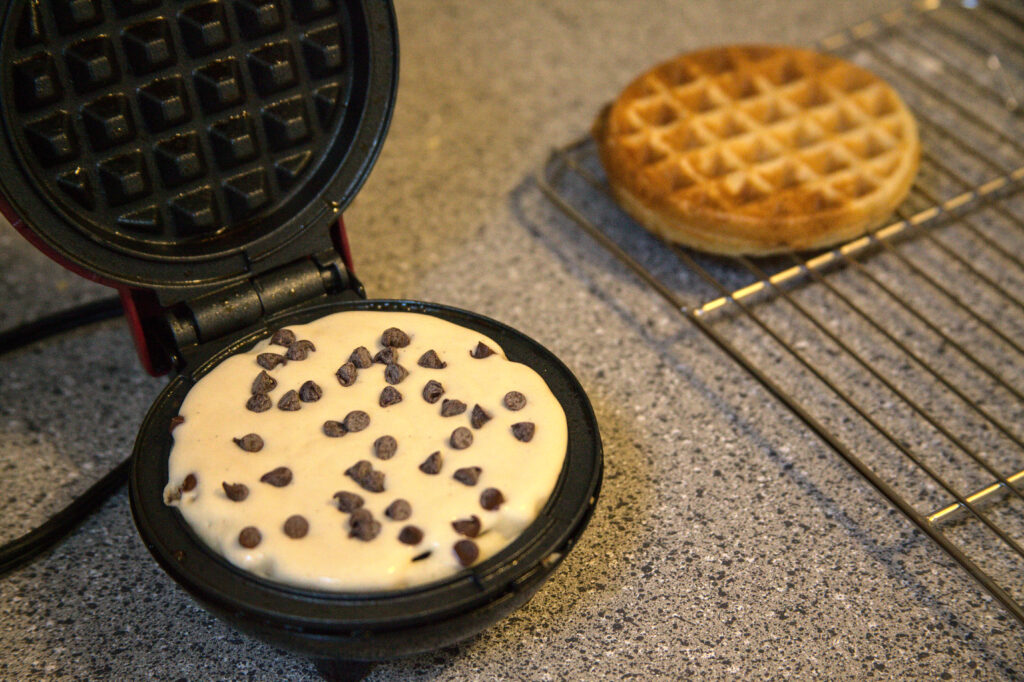
You can also add in any number of toppings, just sprinkle them on top of the batter once it’s been poured into the press. I really enjoy adding mini chocolate chips.
Gluten Free Sourdough Discard Waffles

Ingredients
Instructions
-
Whisk together all dry ingredients, adjusting amount of brown rice flour if not using starter. Whisk in 180g buttermilk, sourdough starter (if using), lemon juice, egg, and vanilla extract. Add 50g water if not using sourdough starter. DO NOT add the butter. Whisk until smooth, adding more buttermilk if the batter is too thick.
Whisking constantly, drizzle in the butter.
Use a waffle iron to make pancakes. Store excess batter in the fridge for up to 1 week.